

![YourCasa rain barrel 240 liters [Wave Design] - Frost-proof & UV-resistant](http://yourcasa.de/cdn/shop/files/B0BZS9ZGGV.MAIN.03-3.png?v=1781178829&width=360)


By using rainwater in the garden, you can use the resources that nature provides you in an ecologically and economically sensible way. How? It's very simple. By using the collected rainwater, you save treated tap water - and in turn, energy and money. Building your own rainwater collection system is not only a practical but also a sustainable solution that significantly reduces the need for tap water for watering your garden at home. Another big advantage: unlike tap water, rainwater is free of lime and therefore softer and better for your garden plants - they will thank you for it.
So how can you build a rainwater collection system yourself? To build a rainwater collection system yourself, install a rain barrel with a filter on the downspout of your gutter. Connect the barrel to an overflow hose and make sure there is a faucet at the bottom to easily drain the water.
You can find out exactly how it all works in our article on "DIY instructions for rainwater collection systems".
Different types of DIY rainwater collection systems
Installing a DIY rainwater collection system can be very simple - or a little more complicated. The choice is entirely yours. You should decide based on whether you already have some DIY experience or whether you want to learn a few skills and techniques. If so, you can also build a more advanced system . In general, however, rainwater collection systems offer an excellent way to use rainwater efficiently in your own garden and do your own little bit to protect our environment.
Simple solutions
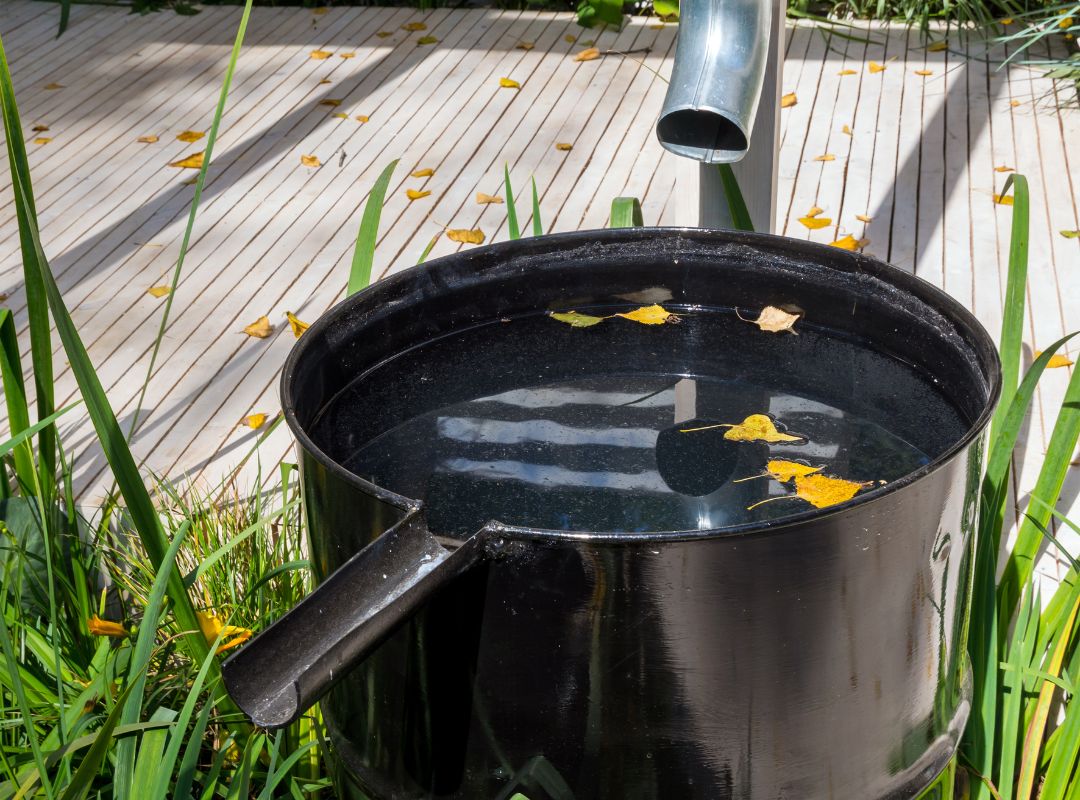
If you're not very handy, are a complete beginner, or don't have enough budget for more complex solutions, a simple DIY rainwater collection system is sure to be perfect for you and your household . A very basic method is to place a rain barrel directly under a downpipe so that the water from the roof is directed directly into the barrel. Such barrels, such as many from YourCasa , are often equipped with a lid and a filter to keep out dirt and leaves, as well as a tap at the bottom so that the water can be removed in just a few simple steps . You can also install an overflow protection on the barrel or simply buy a barrel with an overflow protection, such as the YourCasa Downpipe70 . This drains away excess water as soon as the barrel is full. Such a simple method requires minimal DIY skills and is a perfect option if you want to start collecting rainwater quickly and cheaply.
Advanced systems
If you're willing to take it a step further, advanced DIY rainwater collection systems offer you expanded water collection and use options . For example, such systems can include multiple rain barrels that you can connect together to increase the capacity of your collection system and prevent water that doesn't fit in one barrel from being wasted. Additionally, installing a filter system on the downspout can remove leaves and debris from the water before it enters the barrels.
If you don't want to waste space in your garden, you can even consider building an underground storage solution that can store an even larger amount of rainwater. This is ideal for large gardens that require a lot of water for irrigation, or for use in dry periods and areas. With a submersible pump, the collected water can then be used for garden watering, filling ponds, or even for household purposes such as flushing toilets. A submersible pump is a small pump that you can completely submerge in water. However, such systems require careful planning and complex installation, as a pit must be dug, reinforced, and a tank installed. However, they allow you to use your collected rainwater more efficiently and in more ways .
Step-by-step instructions
Building your own rainwater collection system is worth it - because you not only protect the environment by saving precious drinking water, but you also save money by collecting rainwater . Watering plants with rainwater is also very good for them. You can read how to build your DIY rainwater collection system here.
Materials and tools
To build a rainwater collection system, you will first need a rain barrel, a downpipe, a downpipe filter, an overflow hose, a faucet, a drill, a saw and possibly connectors for the barrels if you have several. Choose a rain barrel from the YourCasa range that is large enough to collect the amount of water you need and make sure it has a stable base. Large rain barrels with a lot of capacity include the following:
|
name |
Capacity (up to) |
Price without discount (€) |
|
440 liters |
95.99 |
|
|
720 liters |
399,00 |
|
|
650 litres |
149.99 |
|
|
YourCasa Rain Barrel 800 Liters [AquaGiant] XXL Square Rain Barrel Made of Plastic |
800 litres |
384.99 |
|
500 litres |
379.99 |
|
|
500 litres |
349.99 |
|
|
475 liters |
349.99 |
Construction of the rainwater collection system
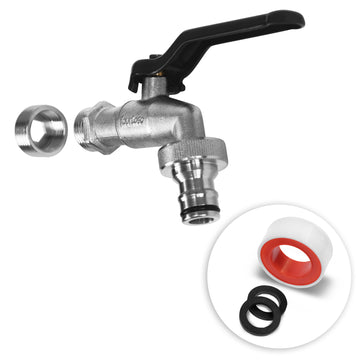
You should start by installing your filter on the downpipe , which should normally already be attached to the house wall - you can find parts at YourCasa under the Accessories tab . Saw through the downpipe at a height that suits your rain barrel and attach the filter so that the rainwater can flow through the filter into the rain barrel in the future. Place the rain barrel under the filter so that the filtered water is directed directly into the barrel. For the overflow, drill a hole in the side of the barrel, above the water level, and attach the overflow hose. If necessary and not already present on the barrel, mount the tap at the bottom of the barrel.
Installation and commissioning
Make sure that the rain barrel is on a firm and level surface. Then make sure that the whole system is stable and secure to avoid tipping over when fully loaded - this would only waste valuable water and, in the worst case, damage the soil in your garden. Check all connections for leaks to prevent water from leaking out. When it rains for the first time, you can simply observe the system a little to make sure that everything fits and everything flows where it should.
Your checklist at a glance:
- Get a rain barrel, downpipe (if necessary), downpipe filter, overflow hose, faucet (if necessary), drill and saw.
- Install downpipe filter on the downpipe.
- Place a rain barrel under the downpipe to collect water directly.
- Attach an overflow hose to the top of the barrel for excess water.
- Mount a tap at the bottom of the barrel for easy removal.
- Set up the system on a firm, level surface and check for stability.
- Check connections for leaks and carry out regular maintenance.
Care and maintenance
Notes on regular inspection and cleaning:
Whether your homemade rainwater collection system will last for a long time depends mainly on how well you care for and maintain it . It's actually quite simple:
- Regularly check the filter and the barrel for deposits and dirt and clean them accordingly to ensure optimal water quality and to prevent stubborn dirt.
- Also pay attention to the overflow hose and make sure it is free of blockages so that rainwater can drain away unhindered.
- Before winter and the first frost, you should definitely drain your system to avoid damage to hoses and pipes.
If you follow these tips, you will be able to collect rainwater in your garden in the long run and do something for the environment and your wallet.
Advantages of rainwater collection systems
Rainwater collection systems offer numerous advantages that are good for both your wallet and the environment . Find out what they are here.
Cost savings and environmental protection
In times of increasing dry periods , it is becoming increasingly important to collect rainwater when it rains and use it when it doesn't. This is possible with a homemade rainwater collection system - and in this way you can do your part to save treated drinking water and thus protect the environment.
But that's not all: If you use less drinking water, your water bill will also be lower . In the long run, a DIY rainwater collection system can also be very worthwhile financially.
Lime-free water for plants
Rainwater is naturally soft and free of lime, chlorine and other minerals that can be found in tap water. This makes it particularly suitable for watering plants, as it reduces the risk of lime deposits in the soil and on the leaves - many plant species, including vegetables, are quite sensitive to this.
All the advantages of using rainwater in the garden and in the home at a glance:
|
Benefits of using rainwater |
Garden |
Household |
|
Cost savings |
✓ |
✓ |
|
Environmental protection |
✓ |
✓ |
|
Lime-free water |
✓ |
|
|
Conservation of water resources |
✓ |
✓ |
|
Reducing the ecological footprint |
✓ |
✓ |
|
Improving plant health |
✓ |
|
|
Reducing dependence on public water supplies |
✓ |
✓ |